fbpx
Image

Author Archive for Richard Cartright

Covid-19 Renovation Guidelines

There is a good amount of misinformation out there, about Covid-19 and how to handle it when renovating your home. While it seems like Covid-19 is here to stay, you can still safely get you home renovated by following some simple Covid-19 Renovation Guidelines on your next project.

One of the best ways to safely remodel is to limit physical contact with your contractors. When you use Construction Conductor, that’s a no-brainer during Planning and Bidding because we show you how to  you through the process.

During Bidding, simply include the following Covid-19 Renovation Guidelines in your Bid Package, so that when you send it out to your bidders, they will know what your expectation are.

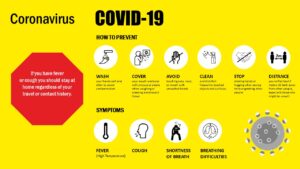
If you’re not using Construction Conductor, go ahead and copy the Covid-19 Renovation Guidelines below and the Covid-19 poster below, and include them in your bid package. You can also post the poster on your project site.


Construction Conductor’s Covid-19 Renovation Guidelines

  • Tent the construction area from the rest of the home to prevent the spread of dust and fumes
  • Wear facemasks while working on site
  • Roll vehicle windows down when workers are traveling together
  • Minimize face to face interactions between workers and homeowner(s)
  • No gatherings larger than 10 people are permitted
  • Social distancing (roughly 6ft of distance between bodies)
  • Hold any meetings in open, well‐ventilated spaces
  • Limit food handling and sharing
  • Practice good hygiene:
    • Use other noncontact methods of greeting
    • Clean hands at the door and wash hand regularly
    • Disinfect surfaces like doorknobs, tables, desks, and handrails regularly
    • Increase ventilation by opening windows or adjusting air conditioning
  • Stay home if…
    • You are feeling sick
    • You have a sick family member in their home
    • If you have Covid Symptoms, (see poster)
      • notify employer
      • follow the guidelines for testing


If your using Construction Conductor, include these Covid-19 Renovation Guidelines to your Bid Package, before going out for bid, so bidders are well aware of your expectations.

Guidelines change over time, as scientists and doctors learn new information, so check out the information at the CDC for the most up to date information.

If you’re interested in seeing how things are going around the world, check out the information on the WHO’s website. If you’ve never worked with contractors before, read about how to avoid the Top 10 foolish renovation mistakes people make, so you don’t make those same mistakes.


Covid-19 Renovation Guidelines infographic

Don’t charge ahead of the Inspector’s inspection

Sometimes contractors think they know what inspector’s will approve only, to be proven wrong. Over the years we’ve learned to appreciate inspectors. Here’s an example of why you don’t want to let contractors charge ahead of the inspector’s inspection.

On one one of my projects, plans called for the electrical subcontractor install electrical conduit and floor outlets in an existing concrete slab. In a meeting, the subcontractor, Tony, admits he was late scheduling the inspection. It means it’ll be another two week before the inspector comes out, creating a delay.

To stay on schedule he says, “I’m going to have my guys go ahead and patch the slab so we can keep moving.”

So I ask, “What’s going to happen when the inspector can’t see the conduit?”

“Don’t worry about it,” he says, “I know the guy; it won’t be a problem.”

We monitored the installation. We knew it was installed per code, but the city inspector has the authority to reject installation. And I’ve met with enough inspectors to know not to assume anything so I say, “Look Tony! You can patch the floor if you want, but you’re doing it at your own risk. The owner won’t pay for you to redo it, if the inspector doesn’t approve it.”

Tony agreed. Because he was was moving so quickly, I wrote him an email that same afternoon summarizing our conversation and agreement. Then I rescheduled the flooring installation to happen after the inspection.

A couple of weeks later, the three of us met on site for the scheduled inspection…

Everything went fine until the inspector saw the new conduit floor patch, and that’s when he said, “Tony, I can’t tell what kind of conduit you installed.” Tony tried, to explain, “We were in a hurry Joe. It’s 3/4″ conduit per code, like we do everywhere. You know our work.”

But Joe stuck to his guns. “Things have changed, and I can’t see it. You’ll have to cut it out and reinstall it, so I can see it,”.  Which is exactly what Tony had to do.

A couple weeks later we had the inspector back out after Tony ‘s guys reinstalled everything, and he approved the installation. Then we patched the floor and installed the flooring.

Tony couldn’t have been more wrong. He had to fix redo that work or we would not have gotten the occupancy permit, which would have delayed the re-opening.

If we had agreed with the subcontractor and approved patching of the floor, we would have been responsible for the cost of redoing that work.

The subcontractor didn’t like it, but because he agreed to charge ahead of the inspector at his own risk, he had to pay for it when it was not approved.

Always wait for the building inspector to complete their inspection before proceeding. There is much more information in Construction Conductor about inspectors, what they look at and when to use them.

Major cities often have in-house inspectors, which can lead to longer lead times due tot eh limited number of inspectors. Cities too small to have in-house inspectors, use companies like Bureau Veritas to support the building department. Contact the building department in your city for more information on your project requirements.

What’s the best way to pay laborers?

Trade contractors generally pay laborers by the hour, or by the piece installed on a weekly or biweekly basis. Let’s look at the pro’s and con’s of each.

By the Hour:
Pro(s) – Laborers are paid a rate per hour for the time they work, capping their cost and making it easier to control the amount of hours employees work. Some workers will want to work as many hours as possible.
Con(s) – Laborers are generally paid an additional 1/2 time the rate for overtime. The employer needs to monitor the performance of the worker and watch the hours to make sure that the laborers work consistently and continuously.

By the Piece:
Pro(s): You only pay them for the units installed, regardless of how long it takes someone to complete a unit.
Con(s): When paid by piece, employers needs to watch to make sure the guys don’t blow through the material and claim they used more than expected. When workers are paid per piece, they are not necessarily the most careful or do the best job, and they are often nowhere to be found for the little corrections that are a common part of what we call the punch list.

Generally, laborers like to be paid on a weekly basis. When they know they are getting a steady paycheck every week they are more likely to continue showing up. Laborers have been known to go from one employer to another for the same pay, just because the new one pays more often. While it’s easy to feel like laborers don’t care about anything except getting paid, as much as possible – it’s important to remember that many really do care about doing a good job. You just have to take the time to make sure they understand the expectations.

Project Phasing is the best way to move forward on a limited budget.

There may be a point in while planning your project that you realize you don’t have enough money to cover the budget on that dream project. When that happens Project Phasing is the best way to move forward on a limited budget.

Project Phasing is common on big projects and is just as useful on home renovation projects.

That sounds complicated and time-consuming. There must be easier are easier, quicker ways out. Right?

Sure, you can find the cheapest contractor with the biggest promises, and fight your way all the way through, but it will end up costing more anyway after you piss off the contractor. In the end, you won’t be happy with what you get, not to mention all the added stress. Why should you suffer all that?

Or, you could abandon the dream and accept mediocre substitutions all the way through, sacrificing quality and longevity; then try and convince yourself that you’re not disappointed, every time you have to address something that wasn’t done quite “right”. In the short run it’ll be cheaper. In the long run, who knows. It can be a lot more. Every project is different. Some will need a little cosmetic touch up, others, complete redo depending on material and workmanship. Why would you want to suffer all that.

Either way, you’ll be glad when that contractor’s out of your life. You’ll only have that bad taste in your mouth, when some detail reminds you of them. Over time that will fade, but before then; you may have paid off that additional loan you had to get when you blew the budget.

There is another, better way. Project Phasing is the best way to move forward on a limited budget.

Project phasing, gets you what you want in chunks you can afford, without sacrificing scope or quality. It’s the best way to move forward with a project when the goal is bigger than your budget. Phasing is easy and works on any sized project.

To phase your project, follow these simple steps:

  • Break your project down in to the basic trade activities (i.e. counters, cabinets, tile, painting, etc.).
  • Estimate the detailed costs for each trade activity.
  • Identify your needs, wants and wishes, to prioritize items by importance.
  • Add up all your needs. These are going to cost what they cost. Make sure it fits in the budget. If it doesn’t, you’ll have to split the project up in to smaller parts.
  • Next are wants and wishes. You can mix these up if you want (no pun intended). Add these elements in to the budget until you reach about 80% – 90% of budget.
  • The last 10% – 20% is your contingency, for unforeseen site conditions; and there are always unforeseen site conditions.


For more detailed information on how you can use project phasing to move forward on a limited budget, or get help planning, bidding, and managing your project, join Construction Conductor.

How to save money in construction and renovation.

I’m not in to clipping coupons, but I like saving money. With most industries it’s easy to watch and wait for a sale to save money on what you want. But in construction there aren’t really sales like that. Construction materials are seldom on sale; and fixtures and finishes are never all on sale at the same time or when you need them.

In construction, there are only a few ways to save money. Some use the lowest cost materials they can buy. Some use the lowest cost labor they can find. Some push people to work faster or sooner than they should. These methods are easy and obvious, but each has it’s pitfall. and while they do save some money, what they cost later in redoing and repairing work is often far greater.

In construction, saving money is about negotiating the best prices for what you want, and controlling costs. The best to do that is to use this simple 3 – step process:

1 – Plan your renovation project and outline all the work you want done. Include adds and deducts to account for things you might or might not want.

2 – Negotiate the best price by using competitive bid, adjusting the scope of the work with new information and objectively comparing prices.

3 – Manage your contractor(s), enforcing the scope, contract and quality you expect, paying only for what is complete.

Contractors make money by getting in, doing the work and getting out. The faster they can get in and out with the least amount of problems, the more money they make. This 3 – step process works because contractors have a clear picture of what they need to do before getting to the project, what the expectations are, how long they have to do it, and the price has been well negotiated before starting.

For a more information on how this works join Construction Conductor.

Should you be your own Realtor?

Real estate flippers, investors and sellers know that realtor fees feel expensive.

Using the 70% ARV (After Repair Value) rule for investing and assuming some reasonable repairs, realtor fees can wind up costing %30 to 50% of the profit.

If you’ve flipped a few properties, you may be thinking about being your own realtor or putting the property up for sale by owner, in order to maximize profit. That’s why many investors become their own real estate agent, but what can seem like a good idea at first can sometimes become more than what you were bargaining for.

There is an immense amount of effort and overall work that goes in to selling property. Countless hours of making and taking calls, evening and weekend meetings, and endless tire kickers, not to mention the classes, yearly licensing fees and costs. Add it all up and there are thousands of dollars and hundreds of hours involved.

If you read “When do you make money on the property flip” (read it here!), you know that there are 3 steps in every flip; 1) buy, 2) fix, and 3) sell, and that you make your money by predicting and controlling the fix, and developing a ‘partnership’ with an agent or broker in exchange for a lower commission to increase the margin on the sale.

No one can do it all, and do it well. If you try, the market often steams past you and you lose your edge. You’re much better off building good teams with people who you work well with. Cutting out an agent who’s spent years cultivating a market, networks and market knowledge is not the answer, learning how to estimate property repairs before buying and using a construction system that helps save time and money, is.