fbpx
Image

Archive for Residential

Top 10 Renovation Mistakes and How to Avoid Them

Renovating your home is almost always a good idea. As we go through life and our families grow and change and as that happens, you can find that your home needs to change with you. That leaves you with a couple choices; renovating, or selling and moving. Renovating is a better choice, because it’s less expensive and causes less disruption to the family, but before you start you’ll want to know the top 10 renovation mistakes and how to avoid them.

If you’re among the millions of people who are afraid of dealing with contractors and getting ripped off, then of course, selling seems easier. But, if you really think about it; it’s more expensive, and a much bigger headache. The realtor can cost 6% off top, there closing and moving expenses, and often you’ll have to renovate a little anyway just to make your place sellable. Then, of course, there is the whole – find a new place, negotiate, close, pack, move, unpack. Holy Cow! My head is spinning, just thinking about it!

I’d much rather renovate, it’s easier; create a little project plan, talk to some contractors, get comparable competitive bids, pick the best bidder, watch them knock it out. Just follow the Construction Conductor action steps.

Most people start projects thinking they’re going to be fast, easy and cheap, only to end up having them become slow, difficult and expensive, because of avoidable mistakes.

Let’s face it; most of us have no idea about how to go about a home renovation project. All we have is a vague idea of what we want when the project is over. If you don’t know what you don’t know, problems are bound to happen, but with Construction Conductor, those problems can be avoided.

Here are the top 10 renovation mistakes and how to avoid them.

  1. Doing it yourself – There are times to do it yourself and times not to. If you don’t know what you are doing, you’re probably going to reduce your home’s value, not increase it. Stick to doing the parts you know how to do correctly and hire an expert to do the rest.
  2. Not creating a budget – Many people start out working on their homes, without any idea of what it’s going to cost them. Then, halfway through the project they either; run out of money leaving them stuck without the project finished, or have to dig deep and find more money. Either way, the contractor is the only winner there. Develop your own budget, so you’ll know what you can afford before getting started.
  3. Being overly frugal – This isn’t the time to try and save money. Every dollar you save by using cheaper materials or cutting corners will cost you in the long run. When you’re project budget gets bigger than you can afford, you’re better off phasing and doing less work, but doing it well. That will add more to your home’s value and your enjoyment of your home.
  4. Choosing the first contractor you talk to – When a contractor comes to talk to you about doing your project, they’re on a job interview. Any of them can look great in that interview; all they have to do is appear to have good rapport, referral and price. Interview several, to find the one you think you can work with the best.
  5. Avoiding government red tape – The average homeowner that starts out to make a change never thinks about getting a building permit or having their work inspected. This can be dangerous, especially if your home experiences a fire or other disaster. If work has been done without a permit, the insurance company can use that as an excuse to avoid paying.
  6. Starting a project before finishing the plan – Unless all you’re doing is painting, you need to fully plan out your project, before starting it. Otherwise, you’re going to end up wasting a lot of time and money, redoing things. Construction work has to be done in a particular order to prevent waste; plan your project before starting so you ensure that you’ve thought of everything.
  7. Buying more material than you need – It’s easy to go to the home improvement center and fill up your pickup with materials. But if you don’t need all those materials, you might have trouble taking them back. Often, materials become damaged on the job, making it impossible to take them back to the lumberyard. Make a material list, based on your plans and only buy what you need.
  8. Making changes midstream – Changes are inevitable in any construction project. Even so, you want to keep them to a minimum. Often, those changes add to the cost of the project by causing things to be done over. A good plan will help eliminate changes.
  9. Not getting change orders – If you’re using a contractor, make sure you sign change orders for everything. Some contractors see changes as an opportunity to boost their profits. Save yourself from a shockingly high bill by documenting every change, along with its cost.
  10. Miscalculating the effect on resale value – A lot of people think that renovating their home will make their home much more valuable. While a lot of projects will add some value to your home, unless you are adding space or improving the quality, you won’t get that much of an increase. Much of what is done as renovation is really to restore the home to its original condition, not to make it more of a home; that doesn’t add to the resale value.

Construction Conductor helps you avoid the top 10 renovation mistakes, work better with contractors, and have a successful project.


Spring Cleaning Means Spring Repairs Too

Winter has thrown its last temper tantrum at us and now it looks like we can finally settle into spring. People are starting to think about spring cleaning; opening their windows to get some fresh air into their homes. Mops and feather dusters have come out as people try to clean off the dreariness of winter and enter the joy of spring. There’s a feeling of new life in the air as flowers start to bloom and birds start to sing.

How did your home weather the winter? Winter is often hard on homes, and the rains and winds of spring aren’t much better. How are your doors? Do they squeak or need new seals? How about your windows? Are they stuck closed or can’t close completely?  Did you feel a draft through them all winter long?

Our homes do a great job of protecting us from the weather, but in the process it’s our homes that suffer. Harsh winters can damage homes, causing windows to crack and leak. We tell ourselves all winter long that we need to replace those windows or put in a new front door, and then when spring rolls around, we forget about it.

Now is the time to take a good look at your home, casting a critical eye towards its condition. Springtime is more than just cleaning time; it’s time to start making plans for what you want to do to your home, so that it’s ready to make it through the next winter even better. Don’t wait till fall, like lots of people do; by then, you’ll probably forget. Besides, all the contractors will be busy with all the other people who waited as well.

Small new window

Changing out old windows and doors can save you money by providing a home that’s more airtight, eliminating all those drafts you’ve been feeling. While you’re replacing your windows, you can take advantage of the opportunity to upgrade them to double or even triple panes; increasing the insulation value of your home. That will save you money next winter on your heating bill.

A single pane window has an R value of about 1.

Double pane windows can vary from 1.5 to 3.0, depending upon the amount of space, and type of gas between the panes. But the real benefit comes from using better “Low E” glass (or glazing).

Triple pane windows can have an R value as high as 6 and double pane windows with suspended film between the panes, along with low energy glass can have an R value as high as 4.5. That’s more than four times what a single pane window has.

Some repair projects are for your family’s enjoyment; but some, like installing new energy-efficient windows are an investment in your home. They help create a more comfortable living environment in your home, while increasing the “curb appeal” of your home when it’s time to sell.

At Construction Conductor, we make sure you get the best deal, as well as the best contractor. After all, your home is worth it.

How much contingency should you budget for your project?

Contingency is a part of the budget set aside to cover possible project problems.
Generally, contingency is there to cover ‘unknown conditions’ or conditions that could not have reasonably been known.  Unknown conditions are a fact of construction and there is really now way to completely avoid them, contingency prepares you for them.

How much contingency you put in the budget depends on how much you know about the project, the age  and construction of the structure, and what you can find out about what you can’t see. In new-construction, the unknown condition is generally underground.

There are ways to prepare for these problems:
In remodeling projects, the original plans or some selective demolition can help you find out what is behind walls, underneath floors, and above ceilings In pre 1970’s homes and buildings you might have paint and pipe insulation tested to ensure they do not contain lead or asbestos.

In new-construction, you can have the ground scanned with penetrating radar, and have bores dug to test and investigate what’s underground. All “unearthed” information can help lower the contingency, though a discovery may also increase your budget.

So, how much should you include for contingency in your budget?

I’ve heard so called professionals say, “Include 50% more than what you were thinking your project should cost in your budget for contingency”. Those people are basically pulling that out of… somewhere.

Professionally recognized cost estimating books, tell you contingency should be between 5% to 15% country-wide, though there are exceptions.

The amount of contingency a given project needs depends on how complete and thorough the planning process was, and how many changes an owner makes during construction. The best laid plans are often thrown off by changes. When owners create a thorough and complete plan and don’t make changes during construction contingency is rather predictable.

In my book, I include a table for knowing how much contingency the average person needs on the average residential renovation and new construction project. Here is copy of that chart and information on how to read it:

No Information With As-built drawings With Investigation & Testing
New-Construction

15%

N/A

-5%

Renovation

15%

-5%

-5%

 
Example: Renovation, No As-Builts, Investigated and Tested
                         15%                – 0 %                          – 5%                           = 10%
 

The top row is project information, the left column is project type. Start with the second “No Information” column and select the project type row 15%. If you have a renovation project and you have the most recent construction drawings or “As-Built Drawings”, subtract 5%. If you have completed non-destructive, destructive and testing as-needed, subtract 5%. The remaining amount is your estimated contingency.

You can see from the chart and the example that the more information you have on the project the less contingency generally needed. Use this chart on your next project to help you estimate the amount of contingency you need.

Making FF&E, Material and Finish Selections

The term FF&E is an acronym for Furniture, Fixtures, and Equipment.

Furniture is movable items such as tables and chairs. Fixtures are the immovable items such as cabinets. Equipment is a machine such as a water-heater or air conditioner. All are used to make a house or other space suitable for living and/or working.

Materials and Finishes, are generally talked about in one of two ways; products and construction materials. Every product you choose while developing your project plan will be made of a specific material with specific finish options.

People sometimes use the terms Material and Finish, interchangeably, but they are not the same thing. Material is what a raw component is actually made of, while the term Finish describes the sheen, color, and texture.

For example, people often talk about paint as if it is a finish, which it is, but only in the context of being applied to another product, like drywall (sheet rock). However, nowadays the paint itself comes in countless finish combinations when considering available colors, texture additives (like popcorn), and sheen such as gloss, semi-gloss and flat.

Manufacturers differentiate their product lines by generally providing better materials, finishes and options in higher priced products.

The same is true in construction. The qualities of products on the market today generally fit into many different categories: Economy, Basic, Common, Deluxe, Luxury, and Custom – or other similar words. Companies can use different words to describe the same quality level, even among manufacturers of similar products.

There are incalculable combinations of Material, Finish and product combinations. There are so many, there is no way to cover all of them, but don’t let that overwhelm you.

Construction Conductor explains how you can use that to your advantage in Who Selects What.

Dear Construction Conductor

Dear Construction Conductor:

What is the cheapest and best way to get several design ideas for my full kitchen remodel? I know I want to remove a wall, so I will have to use an architect.

Sincerely,
On a Budget, Austin, TX

Dear On a Budget,

Thank you for your question. The cheapest and best way to get several design ideas for your full kitchen remodel is to look at several magazines, perform internet searches, buy or borrow a few home design books and even watch the DIY channel.  If you’re like most people, you won’t find one project where you like everything presented. Most people find an element here and an element there and end up piecing the ideas together. As you find project elements you like, make a color copy of the source image (if you can), and identify the element you liked on the copy so you can refer back to it.

Make a list of everything you want to change in your kitchen, referring back to the copied element images. Break your project down in to major groups based on your specific needs;  Flooring, Wall tile, Cabinets, Counter, Painting, Plumbing, Electrical, and in your case Carpentry because you want to move a wall. Whether you need an architect depends mainly on answering two questions; is the wall structural, and what is the building departments’ requirement in your jurisdiction?

If the wall is structural, meaning that it is required to hold up the floor or roof above and your jurisdiction allows, you could look for a contractor capable of doing the final design and construction. Do you know if the wall is structural? Sometimes it’s hard to tell, without investigating the manner of construction in the attic or through minor demolition. If you have no idea how to tell whether the wall is structural, ask a few contractors and compare their possibly varying opinions. In the end, if you do your homework, clearly define what you want, get the best contractor for the best and most-inclusive starting price and have a system and methodology for maintaining control throughout construction, the project will work out well.

Construction coordination can be tricky.

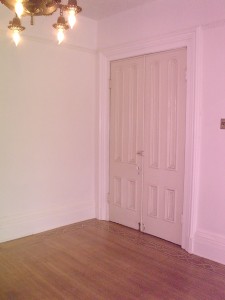
Painted walls and finished floor.

All physical construction work is broken down into parts such as: carpentry, concrete, electrical, flooring and painting to name a few.  The same terms used to describe the parts are often used to describe the trade responsible for executing the construction of that part. Each construction trade’s work is unique. For the vast majority of trade work, the labor must be completed by the specific tradesman. You can’t have a painter install flooring and you can’t have a carpenter run the electricity. However, there are tasks between trades that often overlap and can be handled by either of the involved trades.

Here is a simplified example of overlapping tasks:

Let’s say that you want to get the floor replaced in your house, and you want the house interior painted too. The flooring company installs the floor but can’t do any painting. The painting company will paint everything, but cannot install any flooring, baseboard or quarter-round.

The kind of existing floor you have, determines whether you currently have quarter-round (or base-shoe) in place. It is often less expensive to install new quarter-round than to remove, restore and reinstall the existing quarter-round. For this reason, flooring companies often furnish new quarter-round, if it is needed to ‘finish’ the flooring installation. Sometimes the furnished quarter-round is already color coordinated to match the flooring. Sometimes the quarter-round needs painting to match the walls, and sometimes you get the choice.

You can have the house painted, and then have the floor installed, but who paints the quarter-round after the flooring people install it? You can have the flooring people install the floor and quarter-round before the painters paint, but what happens if the painters damage or get paint all over the new floor while painting? What should you do first? How do you coordinate the work between the trades in order to ensure nothing is messed up or missed?

The best approach is to work with the contractors to schedule the coordinated work between the two tradesmen. Here is a simplified example of how that can work:

If the new quarter-round is designed to match the floor, whether or not the old floor has quarter-round, coordination is really easy. Just have the painters come in and paint then have the flooring installers come in afterward to remove the old quarter-round if neccessary and install the new floor and quarter-round afterward.

If the new floor needs no new quarter-round and the old floor has quarter-round, then include the removal of the old quarter-round as part of the painting prep-work. Then have the painters’ paint before having the flooring people install the new floor.

If the quarter-round needs to be painted, getting everything done requires a little more coordination. Include the painting of the new quarter-round in the painters’ contractual scope of work, this way it won’t add any extra cost to the project later. Ask the flooring company to furnish or let you pick up all the quarter-round in advance. Installers often deliver materials in advance to give the materials time to acclimate to the space’s temperature and humidity level before installation, so getting the quarter-round in advance shouldn’t be a problem. This way you can have the painters’ paint the quarter-round while on site for a cost that has already been negotiated.

Have the painters paint before the flooring installation. The painters should protect all of the furniture and paint as contracted. You won’t have to worry much about the floor if you are replacing it anyway. Once the quarter-round is painted and the paint is dry, have the painters set the quarter-round aside.

Coordinate the work so that when the painting company is finished painting the space and the quarter-round, the flooring company can come in the next day (or shortly thereafter) to install the flooring and the painted quarter-round.

Using this sequence ensures that after the floor installation, all that could be left is a tiny bit of touch up painting at the quarter-round nail holes and cut marks. After the floor installation, if the painters need to come back to the site to paint elsewhere, you can have them touch up the quarter-round as needed. However, if the painters have already completed all their work it will cost more to have the painters come back to do the touch up painting. In this case it is more cost effective to include the touch up painting in the flooring company’s contract scope of work, or handle that ‘tiny’ bit yourself like a GC might do.

For each trade that you add it becomes a bit more complicated to coordinate the individual company’s work. In addition, each project and contractor is unique. Some contractors may be willing to take on more work, while others less. It’s important to coordinate the work during the bidding process, in order to make sure that you don’t pay twice to have the same task completed, or become a captive audience during construction because you forgot to include specific tasks.